May is the “gateway” month – the last month to prepare for all the summer harp fun you’ve been planning. Workshops, competitions, gatherings, schools – there are so many opportunities to meet new people, learn new music, have more fun. And there are also so many opportunities to hurt yourself – carrying your harp more than usual, straining your brain, working your fingers, arms, back and legs!
So let’s use this month to tune up for the long summer. By building a stronger practice over time, you’ll be able to make more progress in your practice time. And because you’ll be stronger, you’ll be able to get more from all the events you’ll attend. Each week we’ll add a new stretch, a technique, and a new practice element focus you can be ready to learn, laugh, and love your harp! Let’s get started*.
 Stretch – Breathing. Stand with both feet on the floor, weight balanced between them (you can also do this sitting with your weight evenly distributed). Keep yourself lifted, head up, back comfortable and straight, shoulders relaxed. Slowly draw in a deep breath into your abdomen, hold for a moment and then slowly let it out. Do this 5 times. Be relaxed and enjoy the deep breaths.
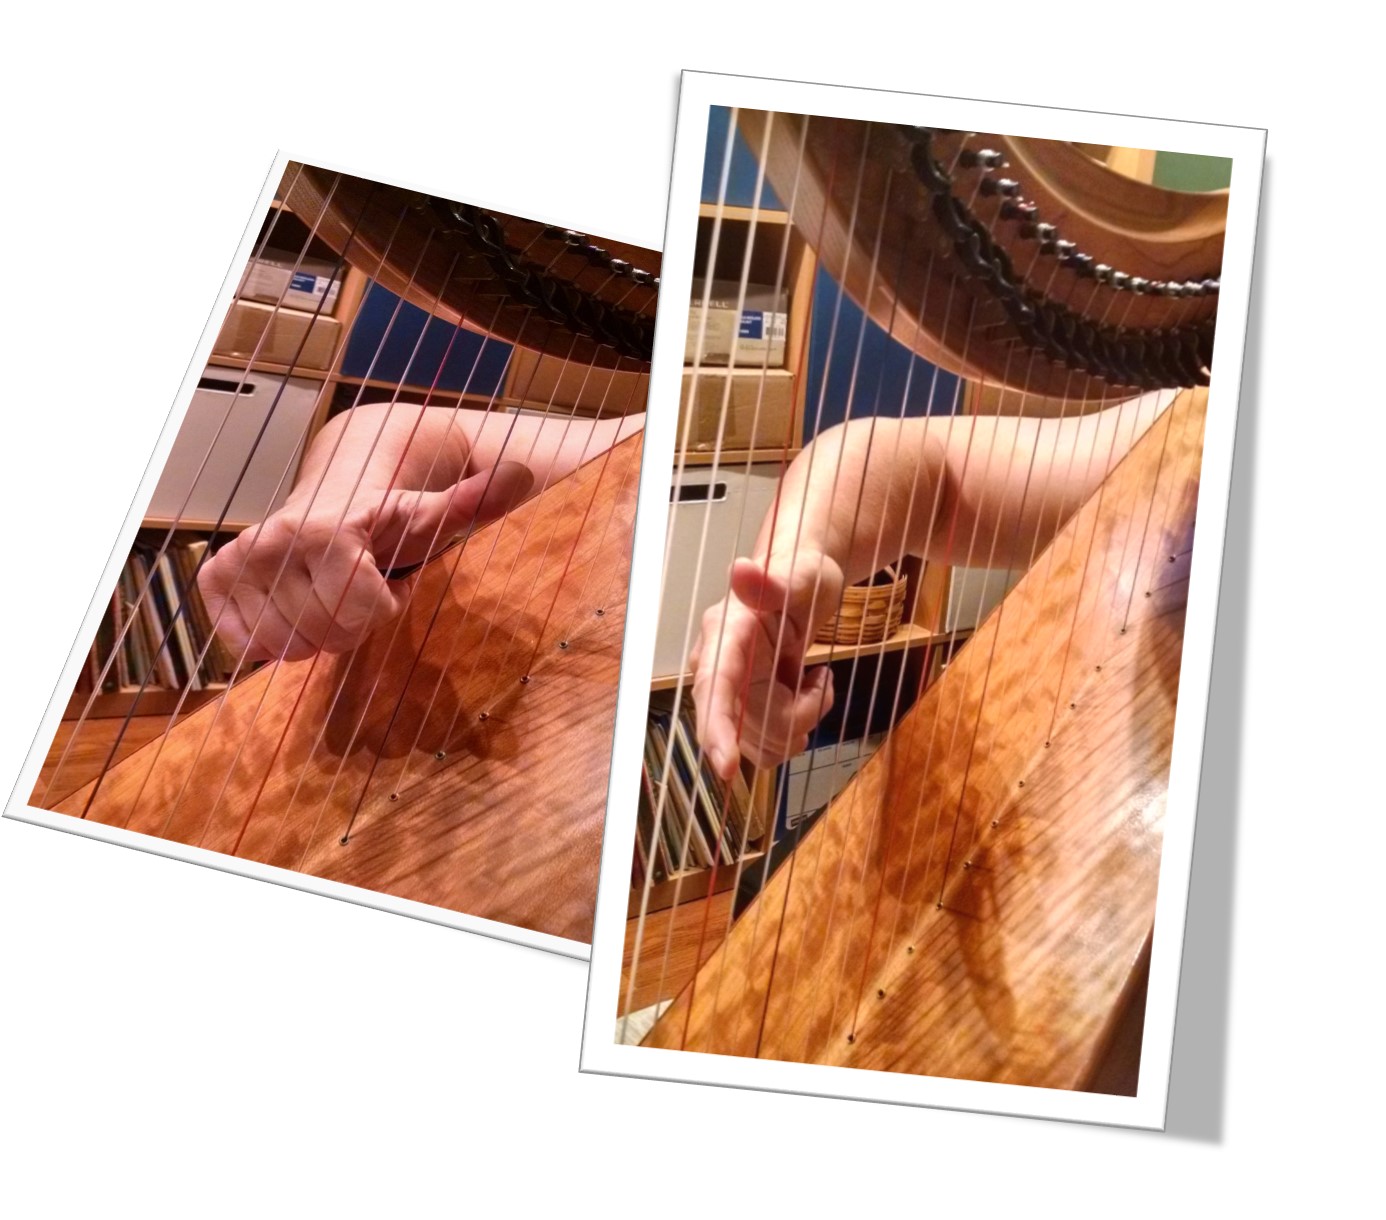
Technique – Intervals. Be sure to watch your fingering. Progress, in your favorite key and scale through the second, the third, fourth, fifth, sixth, seventh, octave, ninth, tenth, and back down. Go slowly and carefully. No buzzing, no misses (errors), even pace, smooth transitions, and mind your hand and arm position and that your wrists are in a neutral position. No tension! Keep your shoulders down and your head up. Start with each hand and when these are good, go on to both hands. If this is too easy, place your hands and then close your eyes. Still too easy? Start with your eyes closed to find the start point. Do not accept “good enough” – this isn’t for your teacher, this is for you – do your best. Not getting what you expect? Slow down more. Go only as fast as you can do it correctly. Do not move faster than you can go accurately, do not rush. Enjoy the beauty of the tones, the feel of the harp against you, the experience of producing amazing sound. And don’t get upset if you can’t do it perfectly – remember – we’re practicing…and you’ll get better with practice!
Practice element – Sitting. This week practice approaching the harp and sitting on the bench. Don’t just flop onto the stool! Lower yourself gently and in a controlled manner. No hands. Ensure that you’re sitting up straight and relaxed. Both feet flat on the floor, weight distributed across your hips. No twisted spine. No shoulders around your ears. No wrapping your feet around the legs of the bench. No rolling your hip forward. Now, stand. No hands. Sit and stand five times – slowly, controlled, relaxed. If you’re not able to do this five times, do as many as you can and work your way up. When you’ve done that, reach for the harp and pull it back like you’re just learning – straight toward your nose before pushing it off to your shoulder. Again check your posture. Set your timer for some random number of minutes and begin to play something you know fairly well. When the timer goes off, check your posture and make any needed corrections. Practicing your posture will allow it to become automatic so you don’t have to think about it when you’re playing!
Slow and steady wins the race as they say – if you don’t feel like you are doing well, keep at it for the week – you will see improvement. Next week, we’ll add another stretch, technique and practice element. Leave a comment and let me know how you get on!
*Remember that I’m not that kind of doctor, so please be careful, work within your own abilities (which isn’t to say don’t stretch yourself but also, don’t hurt yourself!). Be careful and only do what you can do. This blog provides general information about trying to stay health and other subjects related to playing the harp. All the content provided in this blog, and in any linked materials, is not intended to be, and should not be construed to be, medical advice. If you have a medical concern, consult with an appropriately-licensed physician or other health care worker. Never disregard professional medical advice or delay seeking it because of something you have read on this blog or in any linked materials. If you think you may have a medical emergency, call your doctor or 911 immediately. The views expressed on this blog and website have no relation to those of any academic, hospital, practice or other institution with which the author is affiliated. Don’t be thick – these are just suggestions – take care of you!